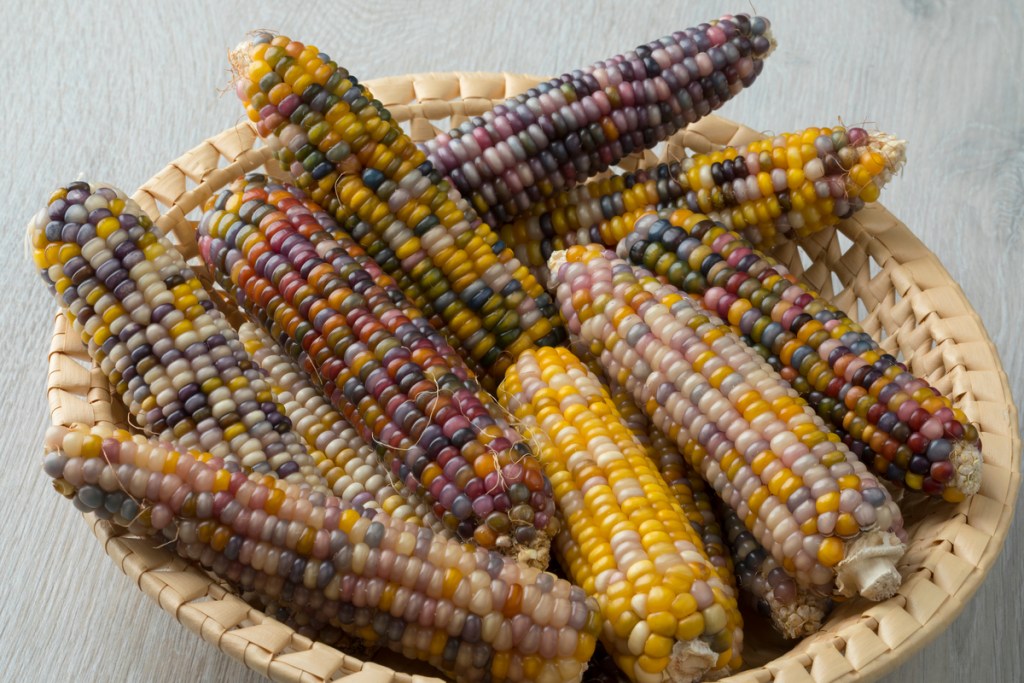
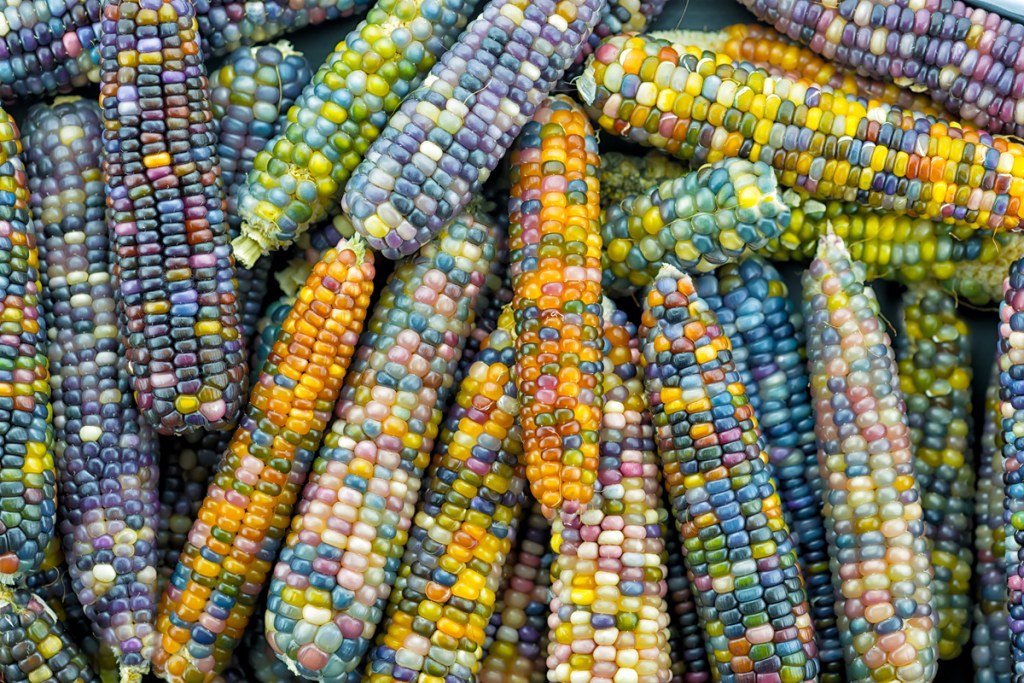
Glass Gem corn has gotten lots of attention since it debuted on Facebook in 2012, and it’s no wonder. This unbelievably sparkly, pastel-rainbow-colored corn looks like something out of a story book. And, although it isn’t used like sweet corn, it’s not simply an ornamental novelty either. Glass Gem is a type of flint corn, which is dried and used for making popcorn, or ground into cornmeal. But don’t expect to find this beauty in the grocery store. If you want to see it in real life, you’ll probably have to grow your own.
What is Glass Gem corn?
Corn (Zea mays) is divided into five major categories: sweet corn, which has a high sugar content and is eaten green; flour corn, which is high in starch and used for cornmeal and flour; dent corn, which is used for animal feed and processed foods; pod corn, which has a husk covering each kernel and isn’t used commercially; and flint corn.
Flint corns, including the Glass Gem variety, produce very hard kernels and are known for significant color variation. They’re mostly grown either for livestock feed or for ornamental purposes, with the exception of popcorn cultivars. Popcorn is a unique subgroup of flint corn with kernels that retain enough moisture to make the kernel expand and explode when heated.
Glass Gem corn at a glance
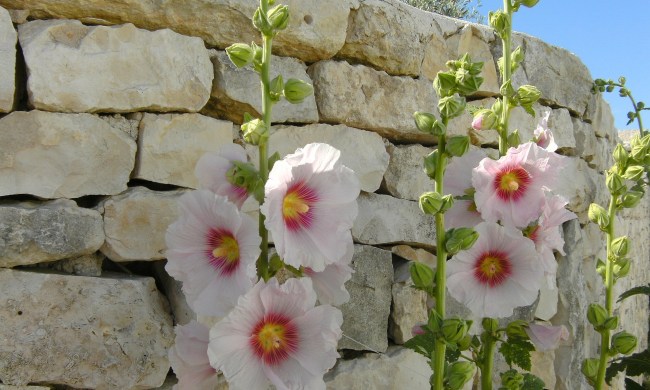
Glass Gem corn is a warm season annual in the grass family. The plants take 100 to 110 days to grow from seed to harvest. They’re pollinated by wind and gravity when the pollen grains (produced by tassels on top of the stalk) fall onto the corn silk (which grows from the tips of the ears). The stalks grow 6 to 10 feet tall, and produce between 2 and 5 ears per stalk. The ears measure from 3 to 8 inches long.
How to grow Glass Gem
Over the past few years, more and more seed suppliers have begun offering Glass Gem seeds. You’ll find it available for order from catalogue companies and online sellers that deal in unique, rare, and heirloom cultivars, such as Native Seeds/SEARCH, Baker Creek Heirloom Seeds, Botanical Interests, and others.
Growing conditions
Choose a planting bed that gets full sun exposure, at least six hours per day. Corn requires well-drained soil with ample organic matter. Amend the bed with compost and a balanced, slow-release fertilizer at planting time. Loosen the soil to a depth of 10 inches.
For the best yields, it needs an inch of water per week from a combination of rainfall and irrigation. Corn is especially sensitive to moisture needs from the time the silks appear until the kernels fill out. Discontinue irrigation once the kernels start to harden.
Planting
Plan your corn patch for good pollination. Since wind is the chief pollinator, the physical layout can help maximize plant-to-plant pollen transfer. Rather than planting a single row, sow seeds in blocks of at least four rows.
Sow the corn seeds directly in the garden one to two weeks after your average last frost date. Plant them 1 to 1.5 inches deep in pairs, with the pairs spaced 12 inches apart within the rows. Separate the rows by 24 to 36 inches. Water well after planting.
Thinning and cultivation
Your Glass Gem seedlings will emerge five to ten days after planting. When the seedlings are 4 inches tall, thin them to one seed per 12 inches. One month after the seedlings emerge, apply granular fertilizer in the row beside the corn plants and lightly work it in with a garden hoe or cultivator. Keep the garden well weeded to eliminate competition for water and nutrients.
Pest management
Although Glass Gem corn is a relatively easy-going crop, corn earworm can be very destructive. The pest is actually the larval stage of a tan-colored moth. Look for a 1 to 2 inch, light yellow, green, pink, or brown caterpillar with white and dark linear strips along the sides. It feeds on corn silk and bores into the ears, consuming cob and kernels. The same pest feeds on tomatoes, beans, and other garden crops.
Defend your corn against earworm by making your garden a haven for predatory insects such as lacewings, ladybugs, and parasitic wasps and flies. Adjacent plantings of sweet alyssum can help. Inspect developing ears for damaged silk and boreholes near the tips. Apply two or three drops of mineral oil just inside the ear about five days after the silks appear.
Harvest
Allow the ears to dry on the cornstalks. Check them by peeling back the husk and inspecting a few kernels. When the kernels are hard and you can’t make a mark on them with your fingernail, they’re ready.
To harvest the corn, twist and break the ears from the plant before the first fall frost. Cure the ears to prevent mold. Peel back the husks and hang the ears in a cool, dry, dark location for four to six weeks. To strip the dried kernels from the cob, twist the cob back and forth in your (gloved) hands.