Weeding 101: How to weed your garden naturally – no chemicals or herbicides

Weeding your garden is one of those things that everyone says you need to do, but if you’ve never had a garden before, then you might not know how to do it. It’s a fairly simple and straightforward task, especially if you know what types of weeds you’re dealing with.

It can also be tempting to just spray on some herbicides and let the chemicals do the work for you. Herbicides aren’t the most effective way to weed your garden, though! There are simpler, healthier alternatives that can work wonders in even the most weed-filled garden. Here’s your simple guide on how to weed a garden without herbicides.

Recommended Videos

Why weed naturally?

Herbicides can be very effective at killing weeds, but they can also harm your other plants. When used properly, in small doses, you may be able to target just the weeds. However, if the herbicide gets on your garden plants, they can also suffer. This is because the only difference between a weed and a garden plant is one is planted deliberately and the other is unwanted. Weeds aren’t any different from other plants, so it’s difficult to make chemical formulas that only affect them.

Additionally, gravity and water can carry herbicides out of your garden. They may find their way into any nearby water system, which can be devastating for the ecosystem of that body of water. The negative effects can get worse if water carries the herbicides even farther away.

Although one person using a small amount may not have a large impact, it’s important to remember that other gardeners in the area may be doing the same thing. The small amounts of herbicide from each gardener can add up, causing a lot of damage.
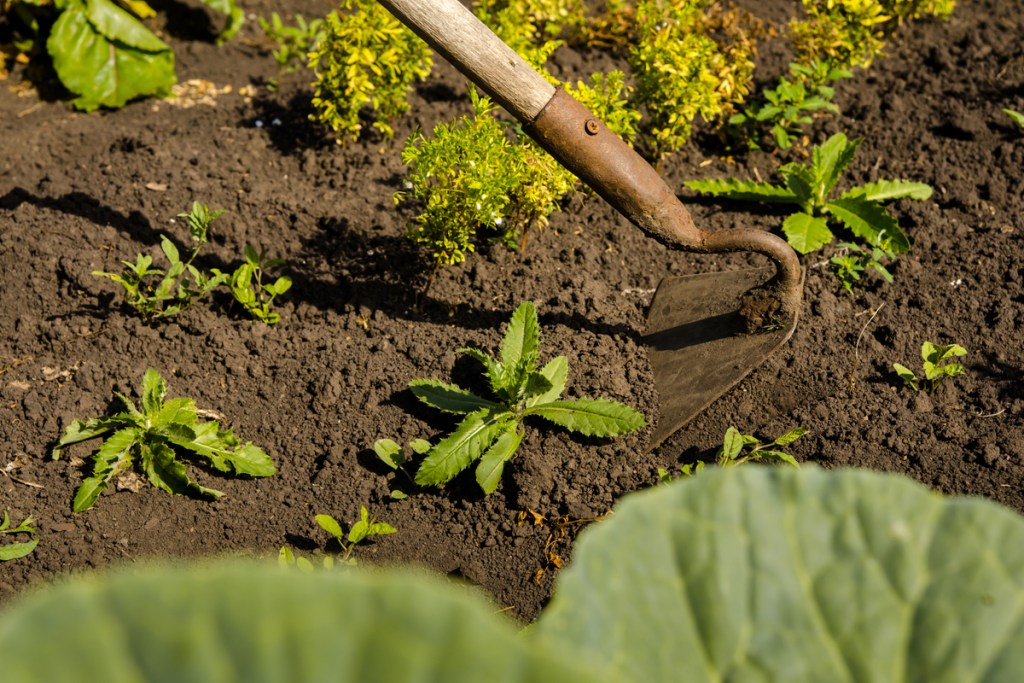
Weeding a garden with a hoe
Vikafoto33 / Shutterstock

Weeding with tools

If you haven’t planted your garden yet, or have a lot of space in between your plants, then weeding your garden with a tool might save you a lot of time. Using a hoe or garden knife can be a quick way to weed if you have a large number of weeds to pull up. These tools are also particularly effective against weeds that are larger or have longer roots. However, if you have just planted your garden, then it’s easy to accidentally uproot your new plants along with the weeds.

Using your tool of choice, slide it into the dirt beside the weed. Leverage the handle away from the weed, so the blade underground moved toward the weed. For smaller weeds, you can do this in one short, sharp motion and pull the plant up at once. For larger plants or those with deeper roots, you may need to repeat the motion to loosen up the soil.
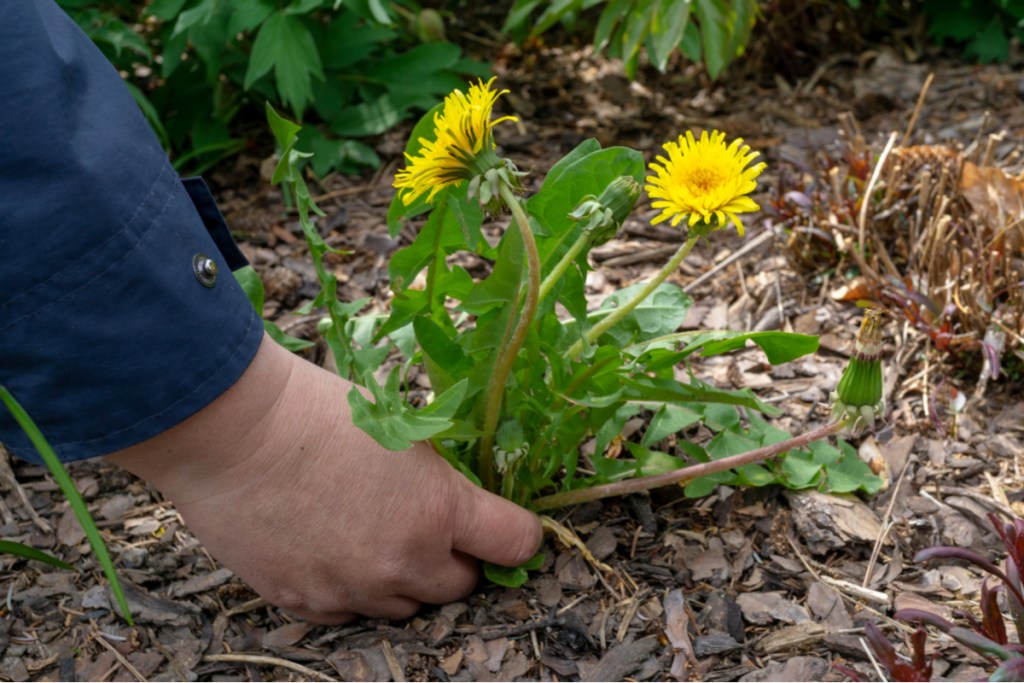
Pulling dandelion weed
Image used with permission by copyright holder

Weeding by hand

Weeding by hand is simple in any circumstance, and while it tends to take longer overall, it’s more effective if you have already planted your garden. Since it’s easy to confuse young sprouts with weeds, it’s a good idea to mark where you planted your seeds. There are plenty of cute signs you can find or make, but the marker can also be as simple as a stick you put in the ground or a stone placed next to (not over!) the seed.

When it comes to weeding by hand, there’s actually a best way to pull weeds. If the soil is hard and compacted, you may have an easier time pulling weeds if you loosen or moisten it first. Grip the weed at the base, as close to the ground as you can manage. Pull it up in one smooth, even motion. Try to get as many of the roots as possible (loosening or moistening the soil helps with this). Don’t worry too much if you leave some roots behind. You can chop the remaining weed roots into smaller bits with any edged object.
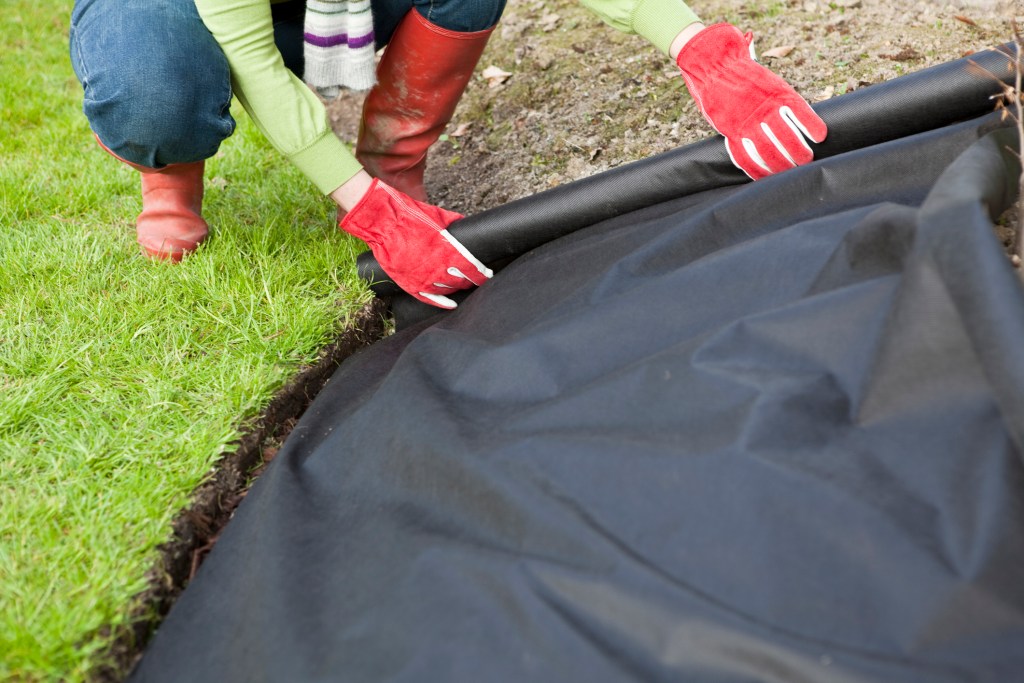
A person rolling black weed barrier cloth out over a stretch of dirt
Image used with permission by copyright holder

Using weed barriers

Admittedly, using weed barriers isn’t exactly the same as weeding. However, it’s an easy, herbicide-free way to suppress weeds and reduce the amount of future weeding you need to do. Use weed barrier fabric or landscape fabric to cover the ground around your plants. You can cut holes for your plants to poke through, if they’ve already sprouting or you can cut slits in the fabric to plant your seeds through if you haven’t planted them yet.

Stretch the fabric tightly against the ground and secure it with garden stakes or heavy objects at the edges. Make sure it’s well secured. Weed barrier or landscape fabric is designed with many tiny holes to let light, air, and water through. However, weeds are unable to grow up through the fabric and will eventually die back.

Now you know that you don’t need herbicides to get rid of troublesome weeds in your garden. Using hoes, garden knives, landscape fabric, or even just your hands, you can keep your garden clear. Your plants will love being able to grow without competing with weeds for resources. Weeding can be a little tedious sometimes, but it’s ultimately easy and healthy for your garden.

Cayla Leonard
Cayla Leonard is a writer from North Carolina who is passionate about plants.  She enjoys reading and writing fiction and…
These cool-season annuals would be a great addition to your garden
Brighten up your garden with these cool-season flowers
Lobelia erinus blooming in a container

There’s no better way to liven up a landscape than with a colorful display of flowers. They brighten the mood, draw attention toward (or away from) critical parts of the yard, and attract hummingbirds and other pollinators. During fall and winter, though, most plants go dormant, leaving patches of brown or gray where there should be lovely colors. Cool-season annuals are a great way to fix this, adding color back to your garden even during winter! Want to add cool-season annuals to your garden? Here's what you need to know!
What are annual flowers?

Garden flowers fall into one of three categories: annuals, biennials, or perennials. Perennials come back year after year. Biennials grow to maturity in their first year and then produce flowers and seed in the second season before they die. Annual flowers complete their entire life cycle in a single growing season. Though they're short lived plants, annuals offer the brightest, most diverse, and longest-lasting color.

Read more
6 incredible types of basil for your herb garden
Add a little variety to your garden with one or all of these basil types
Basil plant bathed in sunlight

Herbs are fun to grow and useful to have around, both for flavoring meals and for keeping certain pests away. Basil is one of the most popular herbs, and for good reason. This tasty herb is versatile and easy to grow, both indoors and out. Did you know there’s more than just one type of basil? If you’re planning your next herb garden, here are six types of basil you should consider including to add a little variety to your garden.
Sweet basil

Sweet basil, also called genovese basil, is the most common type of basil, but there’s a reason it’s the classic. Reliable and delicious, sweet basil gives you the basil flavor and look that you’re familiar with. If you’ve grown basil before, it was likely sweet basil. Place your sweet basil in full sun, with some light afternoon shade if it’s outdoors. Water it regularly to keep the plant fresh and healthy, and you can begin harvesting leaves in just a few weeks, as soon as the plant has four sets of leaves. Be sure to leave a few leaves on the plant so it can continue to grow.
Thai lemon basil

Read more
Your complete sago palm maintenance guide
Grow a sago palm to add a tropical flair to your home
A small sago palm in a pot designed to resemble a wicker basket. It sits on a table of light wood, next to a bookshelf of the same wood. The wall behind it has a dacorative pink, blue, and white triangular pattern.

Sago palms may not be true palms, but they are just as gorgeous. However, with these subtropical houseplants, you won’t have the same kind of look offered by those tall trees. Instead, the green fronds grow directly from the trunk without branching out. Sago palm maintenance is fairly simple, relying mostly on proper growing conditions. Adding this lovely houseplant to your collection is an excellent way to bring the tropics to your home. If you want to grow your own today, this guide will explain everything you need to know to help it thrive!
Care requirements for your sago palm

Because they’re native to tropical regions, sago palms prefer to be in warm, humid environments. This is why, for the most part, they’re grown as houseplants outside of these areas. Sago palms grown indoors should be protected from any drafts or air flowing from heating and AC units as the extreme shift in temperature can cause damage.
Light
Sago palms prefer bright, indirect lighting and shouldn’t be placed in direct sunlight. Direct lighting, especially on hot summer days, can cause sunburn damage and result in wilting leaves. As a houseplant, sago palms will favor east-, west-, and south-facing windows so long as they receive a lot of lighting throughout the day. Keep in mind that too much shade will also cause adverse effects, most noticeably spare foliage.
Soil
Like most houseplants, sago palms need only well-draining soil (and of course, a pot with a drainage hole for excess water to escape through)! There are potting mixes made specifically for palms grown in containers, and although the sago palm isn’t a true palm, this should do the trick.
Water
As a tropical plant, sago palms prefer moderately moist soils. They can tolerate some drought, but not very well. Proper sago palm maintenance requires watering the plant whenever the soil is dry to touch; however, be mindful of how much you’re watering to avoid soggy soil and leaving your plant susceptible to root rot.
Diseases and pests to be aware of

Read more