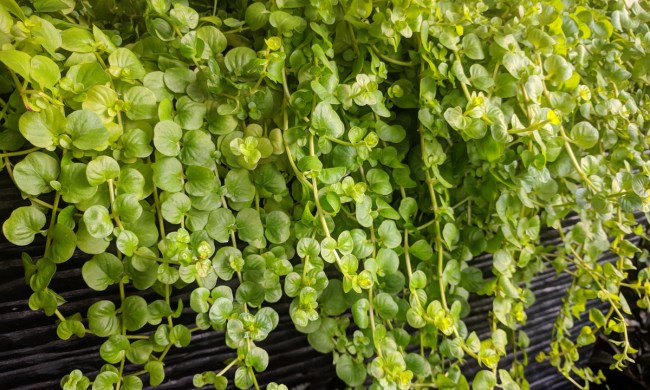
Shrubs can offer many benefits to your garden. Whether you’re growing them as an ornamental addition for their beautiful flowers or looking to grow a privacy hedge, shrubs provide a wide array of options. If your garden is in need of a durable shrub with beautiful flowers, then pittosporum, also called cheesewood, is a great place to start.
Commonly found throughout Asia, Australia, and some parts of Africa, pittosporum is becoming more popular in American gardens. This simple care guide can help you successfully add it to your garden as well!
Planting pittosporum
If you’re planting your pittosporum from seed, you should plant it in the fall. However, older plants see better success when transplanted in the spring. Regardless of when you’re planting it, you should plant pittosporum in full sun to partial shade. Some varieties of cheesewood can even tolerate full shade, so don’t despair if you have a heavily shaded garden.
Pittosporum can grow easily in a container, and there are a few places where it is better suited for containers than gardens. If you live north of USDA Zone 9, then your pittosporum may struggle to make it through winter. With proper protection, you may be able to keep it in your garden, but you’ll see more success if you bring it indoors during the winter. Additionally, parts of Central to Southern California and Hawaii have reported pittosporum becoming invasive or weedy. Growing your cheesewood in a container will help prevent it from escaping your garden if you live in these areas.
Whether your pittosporum is indoors or outdoors, make sure to plant it in well-draining soil. This shrub likes consistent moisture, but it doesn’t tolerate standing water. For container-grown pittosporum, choose a pot with proper drainage holes.
How to care for pittosporum
When planted in naturally rich soil, pittosporum does well without fertilizer. However, if your soil is naturally lacking or has been heavily planted, then your cheesewood will appreciate an extra boost. Feed your pittosporum in early spring, before it begins to put out new growth. Fertilizers with high concentrations of organic matter, such as compost or leaf mulch, are great for pittosporum. A low dose of liquid fertilizer will also work if you don’t have access to compost. Pittosporum is sensitive to overfertilization, so light fertilization is more effective.
Regular pruning and trimming can keep your cheesewood healthy and keep its size under control. Use sharp, clean pruning shears and start from the bottom of the shrub when pruning. Working your way up and away from the trunk, remove any diseased, damaged, or weak branches. Branches that have grown too close together and are crossed or that are growing up against a structure or another plant should also be removed. The wind will cause the branches to rub together, creating abrasions that leave the shrub vulnerable to pests and diseases.
You can use pruning shears to trim your shrub, but many gardeners prefer electric trimmers. To trim your pittosporum, simply remove the ends of the branches. Cut them to be the height and shape you prefer.

Preventing and treating common problems
Thankfully, pittosporum is a hardy plant with few common problems. The issues it does have are easy to avoid or treat.
Fungal infections
The most common problem these shrubs face is fungal infections. Overwatering and poor drainage are the main sources of this issue. To avoid these fungal infections, only water your cheesewood when the soil is dry, and be sure to plant it in well-draining soil. If your pittosporum is in a container and you notice it’s draining more slowly, it could be a sign that the drainage holes in the container are blocked, so be sure to remedy this immediately.
However, you can’t control the weather, and if your pittosporum is outdoors during rainy weather, then you may not be able to avoid fungal growth. Instead, watch closely for signs of fungal infections. Discoloration and stunted growth are two easy-to-spot signs.
You can treat some fungal infections using baking soda or diluted apple cider vinegar, while more serious cases may need a chemical fungicide. Additionally, remove any infected growth with pruning shears. Sanitize the shears afterward and remove the pruned branches from the garden to avoid spreading the spores.
Garden pests
You may find common garden pests on the leaves, such as aphids, whiteflies, and mealybugs. Keeping the leaves healthy is the best way to prevent large infestations, as these pests are particularly attracted to plants that are already weak or sick. Additionally, predators such as ladybugs and garden spiders can help keep the population under control.
There are two pests that primarily feed on pittosporum; to the point that they are named after it. The pittosporum shield bug is unlikely to cause problems, as it’s primarily found in Australia and New Zealand. The pittosporum psyllid may pose a larger threat, however. These small green pests have been found in the U.S., where they are invasive and have few predators to control their population. They leave large welts on the undersides of leaves and along stems and twigs. Since they have no natural predators in the U.S., chemical pesticides may be the only option if your cheesewood becomes infested.
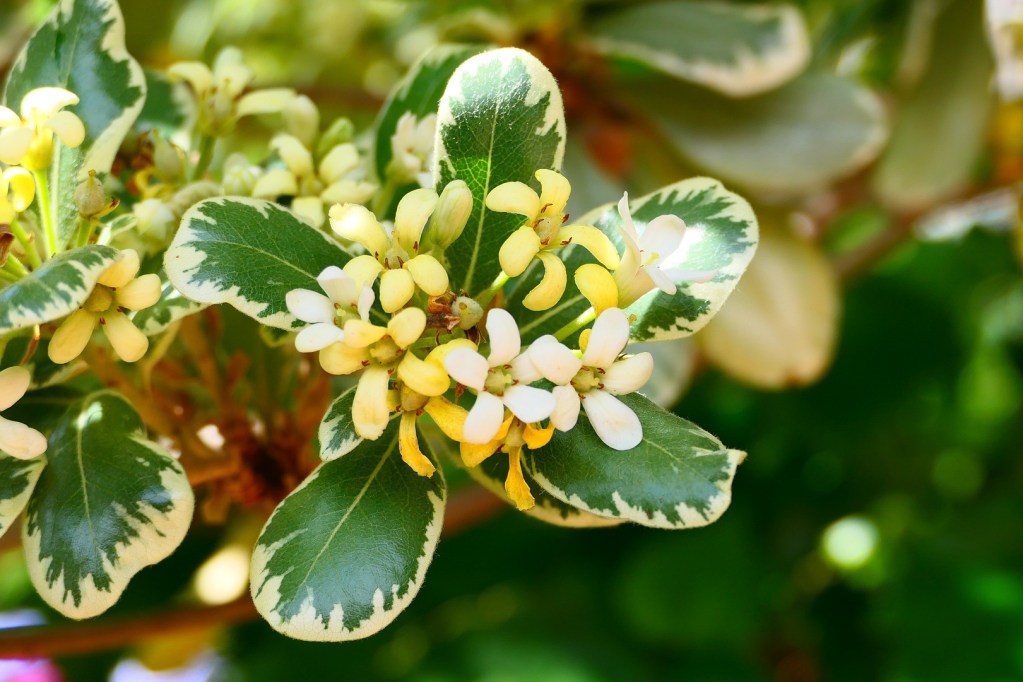
Pittosporum are versatile, hardy shrubs with beautiful flowers. You can keep them in containers, plant them along fences or garden borders, or plant them in other areas of your yard. Now that you know how to properly care for these shrubs, you’re ready to start planting your own!