Artichokes are a delicious vegetable that bring a unique texture and flavor to any meal you add them to. They’re the flower buds of a type of cardoon, but this thistle packs more taste and less prickle. Gardeners of any skill level can grow these low-maintenance veggies , and they're well worth the time and effort!
If you want to add these tasty flowers to your vegetable garden, then stick around! We’ll explain everything you need to know about how to grow artichokes.
Planting artichokes
Follow these steps to set your artichoke plant up for success:
Step 1: Pick an artichoke variety that works well with your needs.
Artichokes in general are hardy in zones 7 through 11, but can be grown as annuals in zones north of zone 7. Imperial Star artichokes were specifically bred to be annuals, making them a great option for northern climates. Green Globe artichokes, on the other hand, are best suited for zone 8 through zone 11 and are perennial.
Additionally, some artichokes produce buds in the first year, while others produce in the second. In some varieties, gardeners even report a taste difference between first year artichokes and those that grow later. For a good first year artichoke, you can go with an annual artichoke, like Imperial Star, which are designed to produce quickly. Green Globe artichokes will also produce buds during the first year.
Step 2: Choose a planting location with full sun and lots of room.
Artichokes grow quite large, so space your seeds roughly 4 feet apart to make sure they have room to spread their leaves.
Step 3: Plant your artichoke in rich, well-draining soil.
Artichokes won’t tolerate standing water, and they are heavy feeders. They need a lot of nutrients to grow to their full size and produce flower buds.
Step 4: Plant seeds roughly half an inch down.
Step 5: Start from a seedling or mature plant to speed up the process.
Artichokes mature slowly, so many gardeners prefer this over using seeds. Seedlings and mature plants can be found in nurseries.
Step 6: Start your artichokes in cool weather, and avoid growing them in the hottest parts of summer.
Warmer zones, typically zones 9 through 11, should plant their artichokes in late summer or early fall. In these regions, artichokes make a great addition to fall gardens. Climates north of zone 9, however, can plant during spring.
Caring for artichokes
Once your artichokes are planted, here's how to care for them:
Step 1: Keep the soil moist but not soggy.
Typically, an artichoke plant will needs thorough watering between one and three times a week, depending on your weekly rainfall. 1 to 2 inches of water each week will keep them healthy and thriving.
Step 2: Start checking for buds a few months after planting.
Artichoke plants take an average of 85 to 100 days to reach maturity. Artichokes planted during fall, for example, typically begin to put out buds in late spring or early summer. If you don’t see bud production, check to see if the variety you’re growing starts producing buds during its second year. Otherwise, your artichokes may be under or over watered.
Step 3: Add a balanced fertilizer or compost to the soil during the growing season, once a month to once every other month.
Harvesting your artichokes
Since artichokes are the flower buds of the plant, it’s important to time your harvest correctly. If you leave them too long they could bloom, and although the flowers are beautiful and smell nice, they aren’t artichokes. Follow these steps to ensure your harvest goes well:
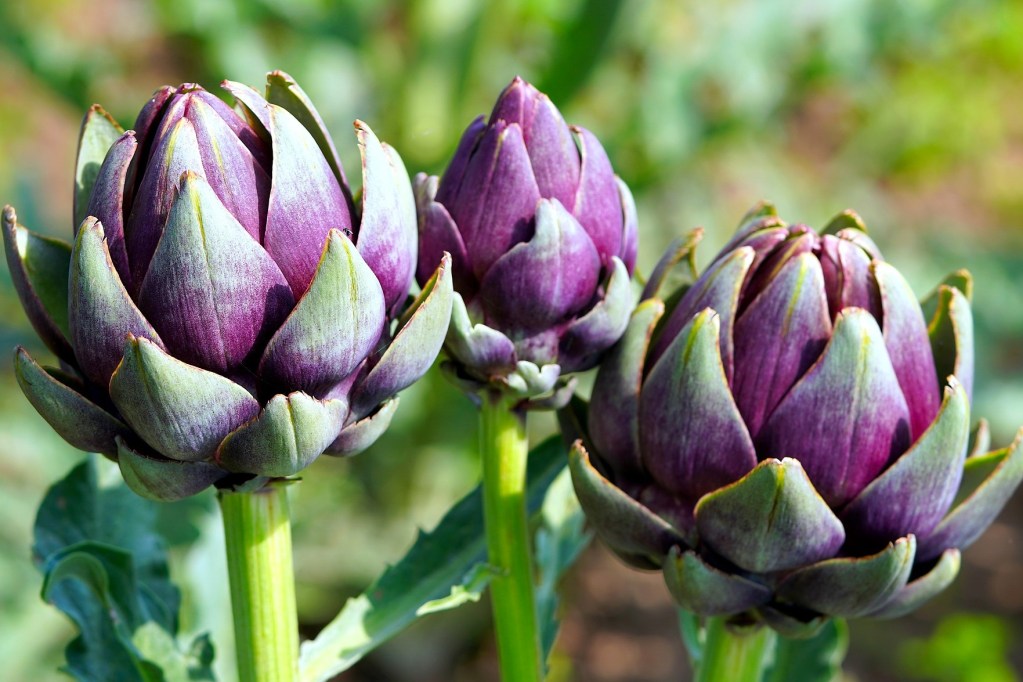
Step 1: Harvest the main, largest bud when it is 3 to 5 inches across.
This gives you a good sized artichoke while avoiding the tougher, chewier texture that comes with artichokes when they grow past 5 inches across.
Step 2: Harvest smaller, side buds when they are between 1 and 3 inches wide.
Step 3: Harvest buds that are firm and intact.
Buds that are soft and splitting may already be in the process of blooming. Once this happens, the texture of the artichoke becomes tough, sinewy, and altogether unpleasant to eat.
Step 4: Harvest your artichokes using a sharp, clean pair of scissors, garden shears, or a knife.
Step 5: Cut below the bud, so that roughly 2 inches of stem will remain attached to the artichoke.
Step 6: Prepare the artichoke for eating by removing the stem, top of the artichoke, and two outer layers of leaves.
Careful! Each outer leaf has a small sharp thorn which needs to be removed carefully before eating. This process is called trimming, and should be done just before cooking and eating.
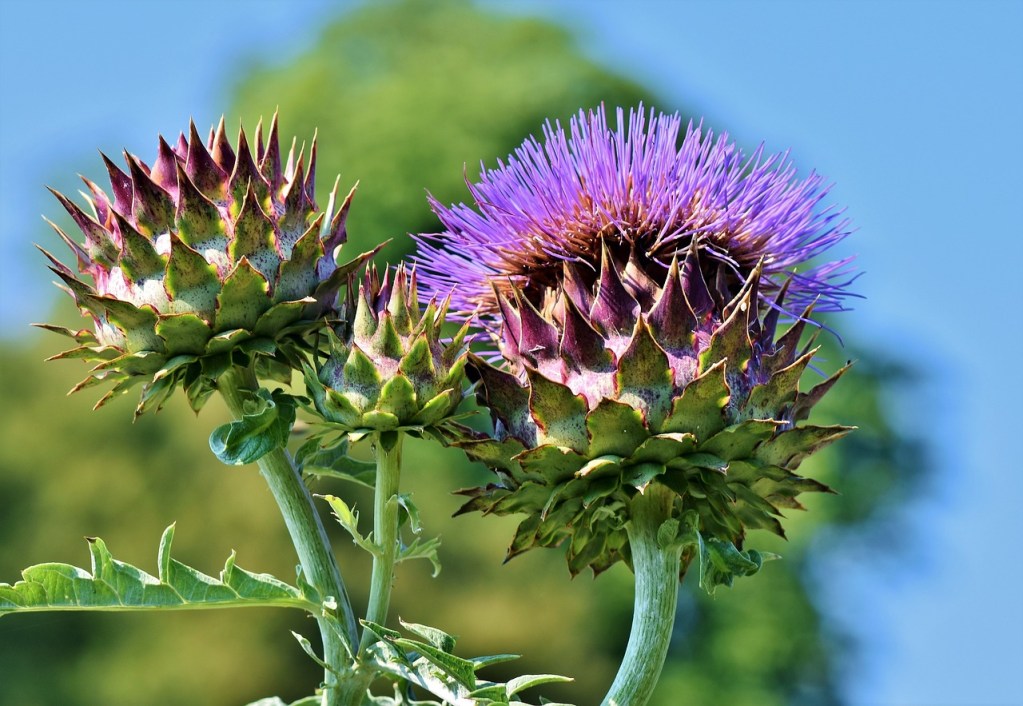
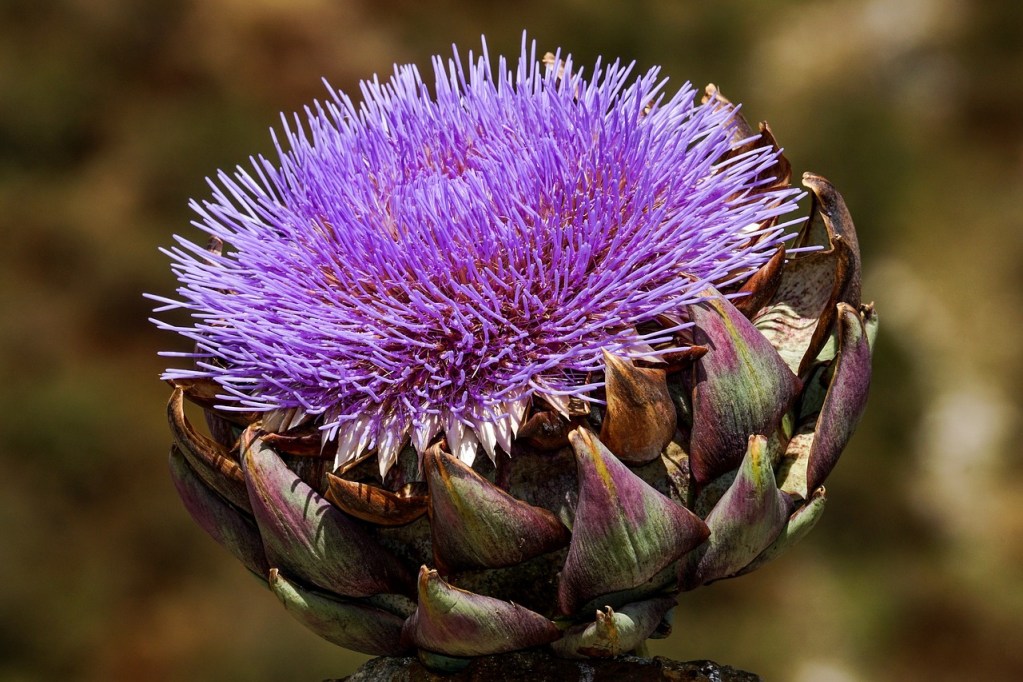
Step 7: Leave blooming buds attached to the plant.
Not only are the flowers pretty, they attract pollinators!
Whether you enjoy them steamed, raw, or as a dip, these vegetables are delicious and nutritious. According to the USDA, they’re high in potassium, vitamin C, magnesium, and even dietary fiber! If you aren’t a fan of their flavor, consider growing them for their flowers. Artichoke flowers are a lovely shade of purple, and their tall stalks make them an interesting focal point. Whether they’re in your garden or on your plate, enjoy your artichokes!