At one point or another, every gardener has found themselves late on starting their seeds. Whether you’re a beginner at gardening or just having a year when everything has been a bit overwhelming, not planting the seeds of your favorite vegetable on time can be frustrating. That’s where Reddit comes in. Reddit gardening has taken off recently, in large part due to the discovery that you can germinate seeds in the Instant Pot (you know, that thing in your kitchen you use to make stews and rice).
The Instant Pot method
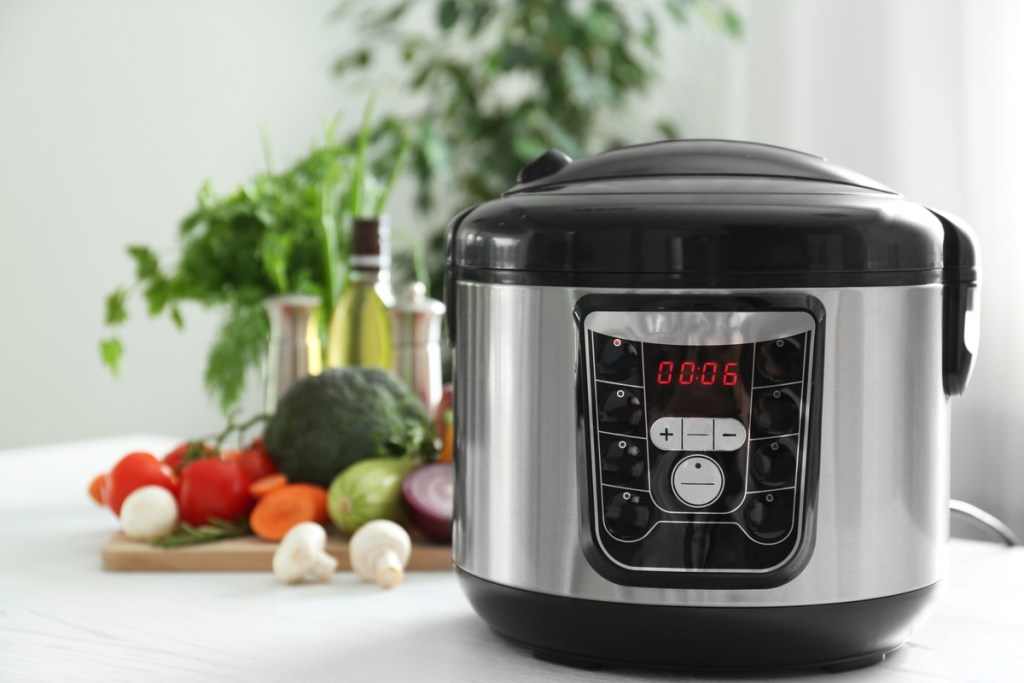
The Instant Pot method involves placing your seeds in the Instant Pot on the yogurt setting. It can be credited in large part to a scientist in Ottawa who, during the 2020 growing season, found herself unable to find seeds until it was well past time to germinate them. Now, could a regular gardener have figured this method out? Perhaps. But for scientist Lyanne Betit, this was a no-brainer.
Thanks to her knowledge of organic chemistry, biochemistry, and gardening, Betit came up with the idea to jumpstart her seeds’ germination in the Instant Pot. She was already behind on the growing season and needed a way to speed things up. Knowing that seedlings in warmer climates can thrive in 89° to 91° F. (32 to 33 degrees Celsius), Betit knew the yogurt setting on the Instant Pot was the perfect consistent environment to encourage seed sprouting.
The Instant Pot method works best for warm weather crops like tomatoes, peppers, and cucumbers. It can be especially helpful if you’re behind on the season like Betit, or if you just want to speed up the initial germination process. For those who don’t have a lot of surface area to dedicate to germination, the Instant Pot method is perfect.
How it works
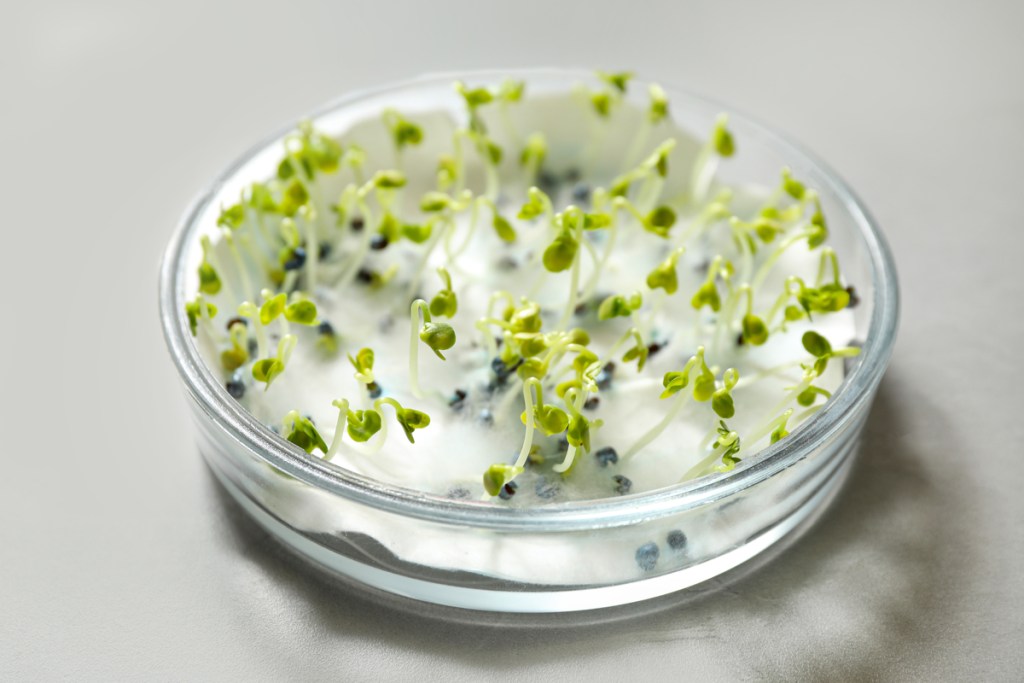
Thanks to the Reddit gardening community, we have a good idea of how this method works. You start by placing the seeds between layers of damp paper towels and putting them in a Ziploc bag. The Instant Pot is turned on and set to the yogurt setting, then the Ziploc(s) with the damp paper towels and seeds is placed inside. There are some seeds that need a slightly cooler temperature and won’t do well inside. Betit discovered you can place these seeds in a Ziploc bag on the lid of the Instant Pot instead. It’s a cooler temperature than inside but is still consistent enough for seeds to germinate.
Why is this possible?
Gardeners often germinate seeds indoors so the seedlings are a good size for transplanting when the outdoor growing season begins. Because seeds require a steady temperature within a set range to germinate and thrive, the Instant Pot provides that environment. It’s warm, void of any drafts, and is a controlled environment — similar to a greenhouse, if you will, but on a smaller scale.
Depending on the seed, the consistent environment is able to help seeds germinate from one to seven days. This method, however, isn’t recommended for cool-weather crops like the Brassica family (cabbage, cauliflower, broccoli, etc.) because the environment will be too warm for them to thrive and survive.
You can try it at home, too!
If you have an Instant Pot, try this method at home! If you’re unsure of the temperature your seeds need to germinate and the packet doesn’t say, the University of California Agriculture and Natural Resources has compiled a list of of ideal seed temperatures. To successfully execute Reddit gardening’s Instant Pot method, you’ll need:
- Your desired seeds
- Paper towels (dampened)
- Ziploc bag(s)
- Sharpie (to mark what seeds are in which bag if germinating more than one type)
- A strainer
- Potting containers for germinated seeds
- An Instant Pot (but of course!)
A step-by-step guide
Starting the Instant Pot method may feel a bit weird at first, and you might not get it right the first try. Here’s a step-by-step guide you can follow to help execute it as best you can:
- Make small piles of four to five seeds and dampen one paper towel per pile (so, if you have three piles of seeds, you’ll need three damp paper towels).
- Place the seeds one inch apart on the bottom half of each paper towel, leaving room for roots to sprout.
- Fold the paper towel in half and place it inside the Ziploc bag. You’ll want one bag per set of seeds, making sure to label each bag with the plant type.
- Pour half a cup of water into the Instant Pot. The water will keep the Instant Pot from burning the bags, as well as help create a warm, humid environment for the seeds. Place the strainer inside.
- Set the Instant Pot to the lowest temperature possible on the yogurt setting. This should be 91° F. Set the Instant Pot for the max time available for your version, which will be anywhere from eight to 99 hours.
- Place the Ziploc bags into the strainer (stacking is OK!) and put the lid on the Instant Pot.
- Be sure to check on your seeds two times a day after the first day, as some may germinate faster than others (especially if they’ve been bought recently or have a softer coating). A majority of the seeds will germinate within a week, and you’ll know they’re ready to be transplanted to potting containers when the tiny white root sprouting from the seed is one to two inches long.
- Be mindful of mold. When you check on the seeds, examine the paper towels to make sure there’s nothing fuzzy growing. Because it can be taken care of in its early stages with a mix of water and hydrogen peroxide, you don’t want to let the mold get out of hand and ruin your germination.
- The seeds should be removed once they’ve germinated using a sanitized pair of tweezers. Grab the body of the seed (taking care not to touch the root) and transfer them to a pot with soil. Make a small hole in the top of the soil, place the seed in with the root pointing down, and bury only the white root, leaving the body of the seed above the soil. Give it a tablespoon of water.
Once germinated and planted, seedlings will need around 12 to 16 hours of light a day. If you don’t have access to this amount of light naturally, be sure you have some grow lights on hand! Thanks to Reddit gardening, seeds all around the world may germinate just a little bit faster from here on out.