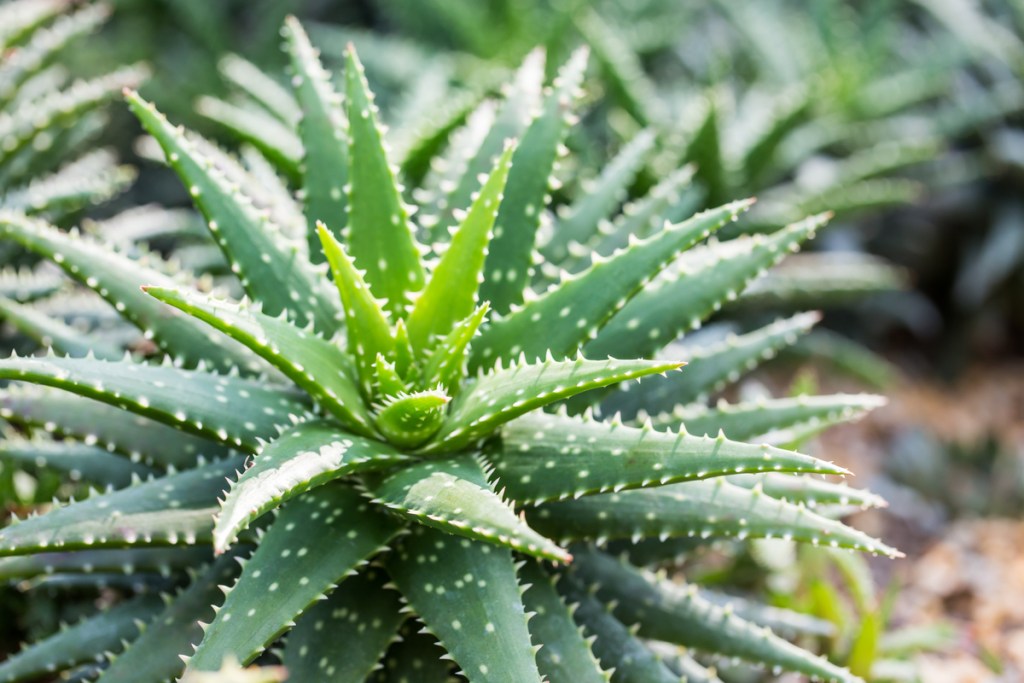
Aloe vera is a commonly grown succulent, both for its spiky appearance and the gel in its leaves. If cared for properly all year long, they can grow tall stalks with flowers in orange, red, and yellow colors. In addition to their beautiful flowers and easy care requirements, aloe vera is popular for it's health benefits. To take advantage of all it's benefits, here's everything you need to know about how to cut aloe vera leaves for the best harvest.

Why you should grow an aloe vera plant
Aside from being gorgeous succulents, aloe vera plants have a variety of health benefits and uses that make them ideal plants to have around the house. They have been used medicinally for thousands of years, and you may have even seen aloe vera in modern-day skin care products. But why not have the fresh stuff right at home?
You can use aloe vera at home, as it has a variety of benefits, including:
- Clearing acne
- Healing burns
- Improving digestive health
For some things, you can simply use the fresh gel that you get from the aloe leaves; however, some (like aloe juice) will require a recipe. If you’re planning on using aloe vera for anything other than a topical salve, you should talk with your doctor to make sure it’s safe for you.
An important note: Not everyone can use the gel of the aloe vera plant. For some people, it causes irritation and discomfort. If you’ve never used aloe vera gel or leaves in any form, test it on a small part of your skin before applying to the afflicted area to see if there are any adverse effects.
There can be side effects to ingesting aloe. Some side effects include:
- Diarrhea
- Low potassium
- Muscle weakness
- Nausea
- Stomach pain
If you’re perfectly healthy and have no underlying conditions, though, aloe is a great plant to grow at home and harvest.

How to care for your aloe plant
Aloe vera plants are a beautiful member of the succulent family that aren’t too difficult to care for, which makes their benefits easy to obtain. Here's how to care for them:
Step 1: Keep your aloe in an area that is between 55 and 85 degrees Fahrenheit.
This may mean growing your aloe entirely indoors or only leaving them outdoors for part of the year.
Step 2: Watch for signs of mealybugs, mites, and scale and remove these pests when found.
Pests primarily target weaker plants, so proper care can cut down on the risk considerably.
Step 3: Place your aloe in bright, indirect sunlight, and out of direct sunlight.
Direct sunlight can easily burn aloes.
Step 4: Water your aloe regularly.
Although they can handle droughts, aloe plants prefer regular watering.
Step 5: Plant your aloe in well-draining soil.
Step 6: Begin harvesting from your aloe once it is a couple yeas old and has reached its mature size, and wait a few weeks between harvests.
Harvesting from aloe too early or too often can weaken or kill it.
How to cut aloe vera plants without killing them
Caring for aloe vera plants is easy. But cutting them? Also easy! As long as you’re harvesting from a mature plant, you shouldn’t have many issues when you follow the process properly. The leaves that you cut won’t regenerate, but your aloe will work to grow new leaves to replace the old ones, so harvesting your aloe doesn’t mean that it’s the end for your plant. Here are the steps to cut and harvest your aloe vera successfully:
Step 1: Choose leaves that are thick, healthy, and in the outer section of the plant.
Step 2: Grab a sterilized pair of scissors or shears and remove no more than three or four leaves by cutting them close to the stem. Take care not to damage the stem or roots of the plant.
Step 3: Wash and dry the leaves, then trim the prickly edges with a knife.
Step 4: With the knife or your hands, gently (and safely!) separate the outside of the leaf from the inner gel. Discard the outer layers.
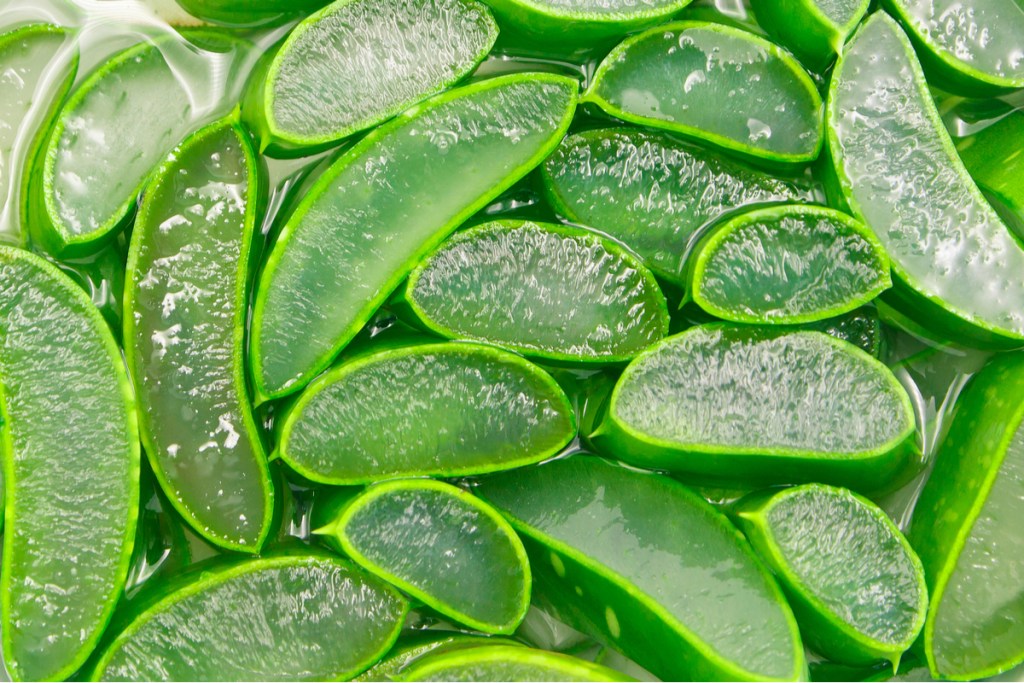
Step 5: Cut the aloe gel into slices.
Step 6: Use the gel fresh or store in the refrigerator for later use.
Aloe gel doesn't last long, so be sure to use stored gel within a few days.
Can you still propagate your aloe after harvesting?
Yes! Because aloe vera plants propagate primarily from offshoots (though they can be propagated by seed) that grow up from the base of the mother plant, you don’t have to worry about the harvesting interfering too much.

How to properly store aloe vera gel
If you harvest more than you can use in one sitting, you'll need to store your aloe vera gel to keep it fresh. Here's what to do:
Step 1: Store aloe vera in an airtight container.
Step 2: Refrigerate aloe vera gel for up to a week.
Step 3: Throw out any discolored aloe vera gel.
Discoloration is the first sign that your aloe gel has gone bad. Once it's spoiled, it unfortunately isn't useful anymore and you shouldn't use it. If you're worried about waste, you can compost it instead.
Step 4: Freeze aloe vera gel for longer storage.
While you can freeze it in any container, many people opt for a clean ice cube tray, as it's easier to portion out once frozen.
Plants need energy to do things, and so depending on how much you cut off, it may take a bit longer for an offshoot to grow to a size where it can be separated; however, with patience, you’ll be able to grow a collection of aloe vera plants that you can harvest from and care for.