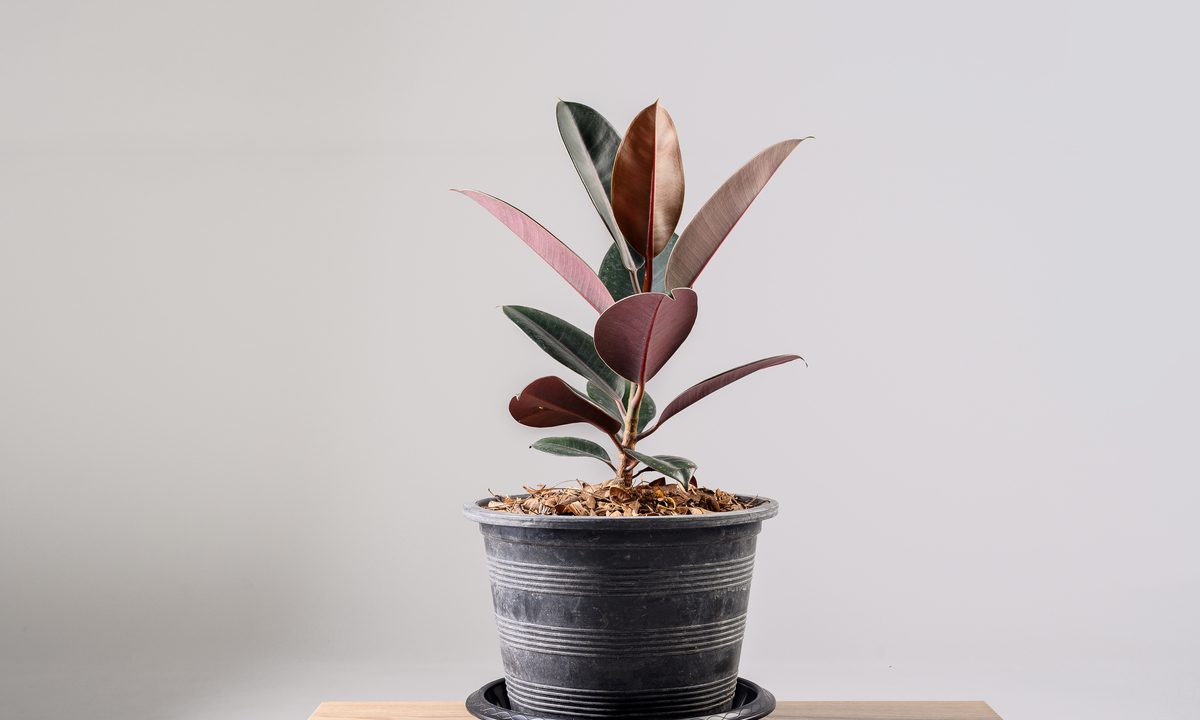
Rubber trees, also called rubber figs, are a popular houseplant native to several parts of southern Asia. These low-maintenance ornamental plants are Ficus elastica, not to be confused with Hevea brasiliensis, another plant commonly referred to as a rubber tree. In addition to being easy to care for, rubber trees have beautiful, glossy leaves and make great office plants.
If you already have one, or if you know someone who is willing to share theirs, then you may want to know how to propagate a rubber tree plant so you can grow more. Luckily, propagating rubber trees through cuttings is easy! This guide will walk you through how to do it.

When should you propagate rubber trees?
Since most rubber trees are indoor plants, you can begin propagating them in any season. You may see better results when propagating in spring or summer, as rubber trees prefer warm weather. However, if you live in a region with mild or warm winters, you should be able to propagate year-round with little to no issue. If your region has cold winters, you can still propagate in fall or winter, but remember to keep your rubber tree away from drafts.
You should also wait until your rubber tree is mature to begin taking cuttings. This is best for the overall health of both the parent plant and the cutting. Some gardeners find it easier to pair propagation with pruning, since these indoor plants can grow fairly tall.

Taking a rubber tree cutting
Taking a cutting from your rubber tree is simple. Here's how to do it:
Step 1: Put on gloves or other skin protection. Before you take your cutting, you should be aware that the sap of the rubber tree can be a skin irritant. Regular gardening gloves or gloves of similar thickness work well to protect your skin. Avoid using gloves made of material that will absorb sap, since it can be difficult to clean.
Step 2: Choose a stem that is at least 6 inches long and has at least two leaves at the end as well as a leaf node near where the cut will be made.
Step 3: Using a sharp, clean knife or pair of shears, make one diagonal cut just below the leaf node.

Rooting the rubber plant cutting
Once you have your cutting, there are a few things you can do to encourage it to root. Here's what you need to do:
Step 1: Strip off any leaves that are close to the cut. The cut end of the cutting will be under soil or underwater, and so will any leaves near it. These leaves would begin to rot, leading to potential infection.
Step 2: Apply rooting hormone to the cut. This is helpful but optional. Rooting hormone can speed up the rooting process, and it's fairly easy to find at most garden supply stores. However, cuttings will root without it.
Step 3: Place your cutting roughly 2 to 3 inches deep in either water or soil. Cuttings longer than 6 inches can be planted deeper. Cuttings rooted in water can take 12 weeks or longer to root, while cuttings rooted in soil take about half as long.
Step 4: Place the cutting in a warm location with bright, indirect light.
Step 5: Change the water once a week for cuttings rooted in water.

Caring for the rubber plant cutting
Here's how to care for your new rubber tree:
Step 1: Use regular potting soil to plant your cutting. If you already have an adult rubber tree, you can use the same potting mix for your cutting.
Step 2: Keep the soil consistently moist.
Step 3: Place your cutting in bright, indirect light and avoid direct light. Although adult rubber trees can tolerate some direct light, cuttings are more sensitive.
Step 4: Keep your cutting away from drafty windows or air conditioning vents.

Is it better to root rubber tree cuttings in soil or water?
You can use both water and soil can to propagate rubber tree plants. However, rooting cuttings in soil tends to be more popular when it comes to rubber trees. Rooting them in soil is faster and generally more reliable. Cuttings rooted in water can begin to rot if you don't monitor them carefully.
The downside to rooting cuttings in soil is that transplanting them after they've rooted can be tricky. While they are young, their roots are still tender and easy to damage. So if you're rooting your cuttings in soil, make sure you choose a suitable pot to avoid needing to transplant them too soon.

Is propagating rubber plants from cuttings easier than air layering?
The short answer is yes — propagating rubber plants by cuttings is easier than air layering. You simply won't need as many supplies. With air layering, you will be propagating a new plant while it is still attached to the mother stem, so you'll need extra tools to keep your propagation point secure. Still, if you did want to propagate your rubber plant by air layering, here's how to go about it.
Step 1: Pick a node about 1 to 1.5 feet from an upper shoot and strip a few leaves around your designated cut point. Make sure that you are wearing gloves to avoid contact with the sap.
Step 2: Just above the node, make a wound about a quarter of an inch thick around the stem, getting down to the woody stem without chopping off the stem completely. During these next few steps, you'll want to hold the node area with a towel to prevent contact with the sap.
Step 3: Repeat below the node, then scrape off the bark around the node by using the two wounds as guiding points.
Step 4: Add rooting hormone to the wound and then wrap wet sphagnum moss around it.
Step 5: Secure everything together with plastic wrap.
Step 6: In a few weeks, roots should form. Remove the plastic wrap and moss, and then cut off your propagated rubber plant and pot it up.
Propagating rubber plants is a simple, easy process. You can even propagate the same plant multiple times. Cuttings that have established root systems make great gifts, and, if you pair your propagation with pruning, you’ll also get the benefit of a smaller, more manageable rubber tree. Now you know everything there is to know about propagating your rubber tree plant.

