Seeing mold on your soil and plants is never a cause for celebration, but it also isn’t always a cause for panic. Mold on indoor plants can be fairly common, depending on the conditions the plant is in. Knowing how to prevent mold on soil will be the first step to getting rid of it and decreasing the chances of it reappearing in the future.
Identifying mold on your soil
There are three different types of mold that can show up on the soil of your indoor plants: sooty mold, white mold, and gray mold. Each type has different causes and presents differently, so it’s best to familiarize yourself with all of them so that you know what to look out for and how to combat it.
- Sooty mold presents in dark green or black colored patches that, well, resemble soot. These patches will be around the base of your plant and the surface of your soil and often indicate that your houseplant is infected with sap-feeding insects. While it doesn’t immediately harm your plants, the insects should be cause for concern as they could infest other plants in the vicinity, and the mold could negatively affect photosynthesis.
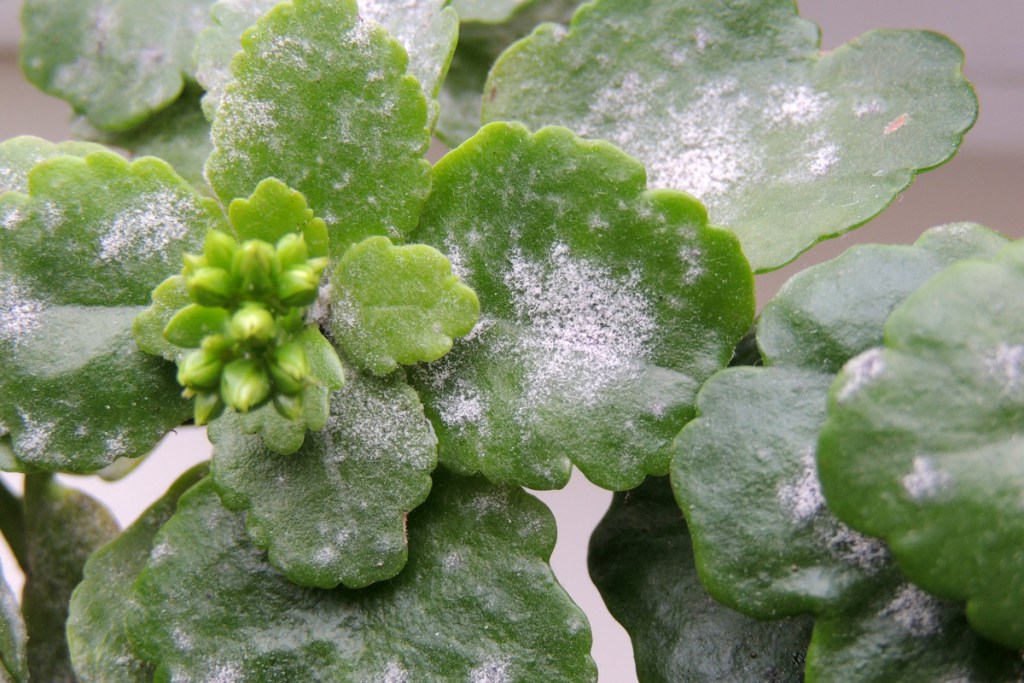
- White mold bears a closer resemblance to the kind of mold we find on food, like cheeses that have gone bad. It’s fuzzier in appearance and grows on the soil’s surface when conditions are too damp. It doesn’t often harm the plant but should be removed as soon as you notice it. Otherwise, it will continue to grow and the spores could potentially infect other plants.
- Gray mold has identifiable, dusty-looking gray spores that can be found near the soil’s surface. Though not directly on the soil, that is a good place to look when searching for this type of mold because it also appears in less noticeable, dense areas of the plant’s foliage. Gray mold is most often caused when the spores land on plant tissue that’s already diseased or dying. Infected areas will grow quickly in size and kill the plant if left unchecked.
Getting rid of soil mold
How you get rid of soil mold will depend on the type of mold you’re combating. Since most of the recommended processes involve hand-cleaning the mold, be sure that if you’re sensitive to mold, you’re wearing a mask and gloves to limit exposure.
- For sooty mold, the process will differ depending on the number of insects. Few insects mean you’re fine to pick them off by hand, with sterilized tweezers, or wipe them off with a cotton swab soaked in alcohol. If the insect population is too large for that course of action, you’ll need to apply insecticidal soap, carefully following the directions as too much will adversely affect your plant.
Once you’ve treated the root cause of the mold, you can clean the sooty patches off the stems, foliage, and soil surface with a clean, damp cloth or diluted soap solution, rinsing the leaves gently afterward. - With white mold, it’s usually as simple as cleaning off the mold from the soil’s surface and adjusting the plant’s conditions. This could mean watering it less or removing the mold and repotting the plant in a clean pot with fresh soil.
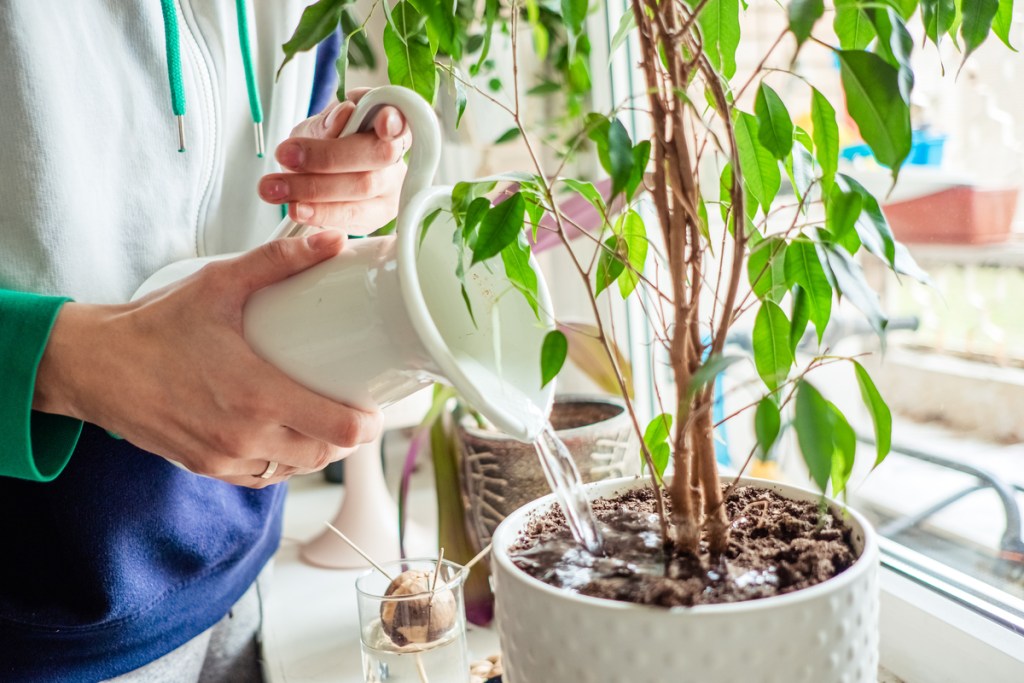
Believe it or not, mold spores are actually present in potting mix from the get-go. When we overwater our plants and the soil becomes too wet, we give spores the perfect environment in which to thrive. This is part of why proper watering and a pot with good drainage are so important to a plant’s livelihood. - Gray mold is a bit trickier. For this type, you’ll want to isolate your plant from the rest of its friends and cut off any of the diseased, damaged, infected, or dead foliage/stems using a sterilized pair of shears or scissors. A fungicide should then be applied to the plant and soil, carefully following the directions on the bottle. The fungicide should be reapplied every one to three weeks, depending on the type you chose, until the mold is gone.
Unfortunately, if the mold is not caught soon enough, the plant may be too far gone. If you notice there’s too much damage, it would be best to dispose of the plant to remove the risk it poses to the others.
How can you prevent future mold problems?
Preventing future mold problems, whether sooty, white, or gray mold, relies heavily on proper care and conditions. The biggest cause of mold is overwatering/damp environments, so be sure you know how to best water a plant—and that they’re in pots with good drainage—to minimize that risk. Proper lighting will help aid this first step, as well, as the soil will dry out faster.
One of the most important things you can do is pay attention. It’s that simple. If there are spent leaves or flowers, or if the plant has some damaged foliage, remove it right away. This limits the ability of molds like gray mold to have a place to thrive and reproduce, and it will help keep your plant happier and healthier. You should also inspect any new plant before bringing it home for bugs or infections. It’s a good idea to keep new plants isolated from your existing ones for at least two weeks so you have a chance to notice any changes you didn’t see before bringing it home.
Sometimes, it’s too late
Sometimes, despite our best efforts, the plants are still too far gone. We can do everything right, and something can still grow wrong. There could still be white mold on a plant you’ve been watering the way it likes, and that’s just how things go. Nothing is guaranteed, but we can do our best to remove and prevent infections and infestations, giving plants the best home we can while they’re with us.